1 September 2017, 18:26
sass ~ an introduction
![]()
In this post I am going to be building off a previous post you can find here. I went over how to install and setup Sass using Ruby aswell as the basic project structure, since that post I have came across away to use Sass with Node.
The steps are lined out in this post by Zviad Sichinava. Since I am already using NodeJS in my workflow I've made the switch.
Of course you can use task runners such as Gulp or Grunt to get the job done, but there is really no need for the overhead if you are just playing around with Sass's functionality. I've found that build tools can become a bit of a rabbit hole and you often times spend more time on setting up build tools than actually writing code, this up front cost is worth it on bigger projects but not really for small or medium ventures.
For reference I am assuming you project folder is as follows:
index.html
|
css/styles.css
|
|--scss/
|    |-- partials/
|    |    |-- _base.scss
|    |    |--_variables.scss
|    |    |--_mixins.scss
|    |-- styles.scss
|----♦ ♦ ♦-----♦ ♦ ♦------ Other folders unrelated to this tutorial
|--js/
|--img/
|
X
Your recipe to get the most from Sass.
Head over to github and grab the repo if you would like to follow along: resource.
{ If you don't know what git or github is check out this post by a fellow steemer @jfuenmayor96. He has a great series on getting to grips with git. }
Navigate to the freshly cloned repo and run npm install and you should be good to go, I'm assuming you have Node and NPM installed and know how to work a computer. You can also run npm i to really feel like a badass.
Variables
Variables in Sass are like variables in any other language they hold values that can be used anywhere throughout the project, although strictly speaking they are more like constants than variables as there is no reassignment, but thats a story for another post. This one feature of Sass should be enough to justify trying it out, (no more looking up Hex codes).
I mainly use variables for things like colors, fonts and occasionaly spacing. Here's a quick example:
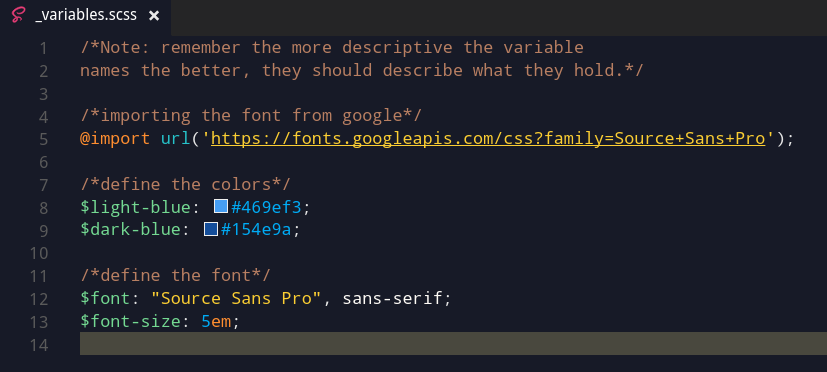
/*Note: remember the more descriptive the variable
names the better, they should describe what they hold.*/

/*importing the font from google*/
@import url('https://fonts.googleapis.com/css?family=Source+Sans+Pro');

/*define the colors*/
$light-blue: #469ef3;
$dark-blue: #154e9a;

/*define the font*/
$font: "Source Sans Pro", sans-serif;
$font-size: 5em;
Variables always start with $ in Sass which is the convention in many other languages so it shouldn't be too out of the ordinary. You can find the completed project for reference in the sass-starter-reference folder if you get lost or want to skip ahead and get going right away.
You can also do math with variables and pass them into Sass's build in functions ( you can make your own functions that's coming up next ) here's a list of the toys that Sass comes with out of the box: functions list
Each sub-folder will have access to the set of node_modules at the root of the folder and you can run from the root npm run sass to watch and compile the sass in the sass-starter and npm run sass-ref for the reference. However the npm run sass will not do anything at this stage, patience young padawan.
Mixins
Mixins! Get excited for mixins they are a very fun and exciting, really they are very useful, once you have an arsenal or mixins at your disposal you will be surprised how quick you can go from concept to design. Infact there are mixin libraries such as Bourbon. Bourbon is superb and also has its own set of sub libraries that are on the website if you wish to explore them ( I encourage you to do so ). There is also a huge suite of mixins called Compass which has a ton of features.
Mixins are essentially functions that you pass parameters into and a value is returned that can be used to style an element. They aren't technically functions because their function is to generate code at compile time not execute code at run time, templates maybe? Macros? Whatever they are, they are a core factor in the enjoyment of using Sass.
Let's continue working on our starter project, add this to /sass-starter/scss/partials/_mixins.scss
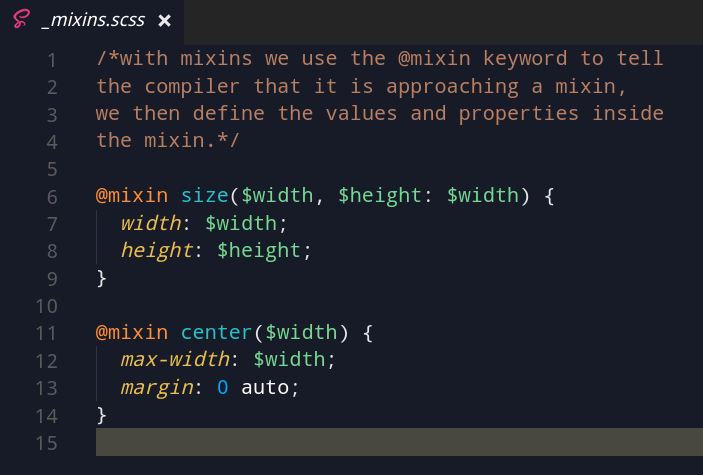
/*with mixins we use the @mixin keyword to tell
the compiler that it is approaching a mixin,
we then define the values and properties inside
the mixin.*/

@mixin size($width, $height: $width) {
  width: $width;
  height: $height;
}

@mixin center($width) {
  max-width: $width;
  margin: 0 auto;
}
It's worth noting that npm run sass is still not working at this point, we will fix that in the next section, we will also see how the above mixins work. they are fairly contrived examples, I'd recommend checking out this post on mixins to really see their power.
Nesting and using Sass
It's about time we actually started styling something, notice in the index.html file that there are only four classes that we will be styling main main-img main-text inner-text.
With nesting you can style elements that are within other elements. Let's look at a example, we will also be using those mixins we made earlier. First we have to hook up our base partial to the styles.scss which is the entry point to Scss folder and what node-sass is watching.
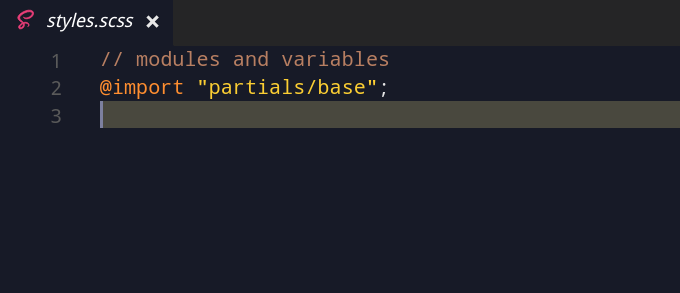
// modules and variables
@import "partials/base";
Quick Side Note
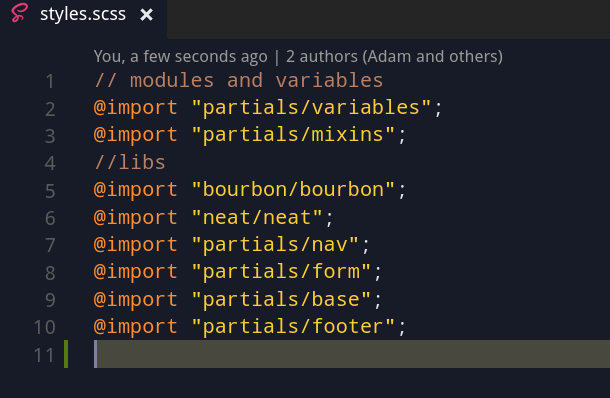
It's worth noting that in larger projects you can also put all your partials in the
styles.scssor entry point to your scss , the order is important with the lower imports having access to the ones above it, but not the other way around. Below is an example from another project to give you an idea of what I mean.
Back to it
The _base.scss can now be seen by node-sass, next we can hook in the mixins and variables we made earlier to the the _base.scss file and add some styling that will be applied to our webpage.
Once the two top import statements are added we can now head over to the terminal and run npm run sass, now the node-sass module is watch for changes on the styles.scss which hooked into the _base.scss which is hooked into the _variables.scss and the _mixins.scss. Hopefully you can picture how this is all working.
Let's look at our finished styles.scss file. Notice how we are passing in values to our mixins and using our variables.
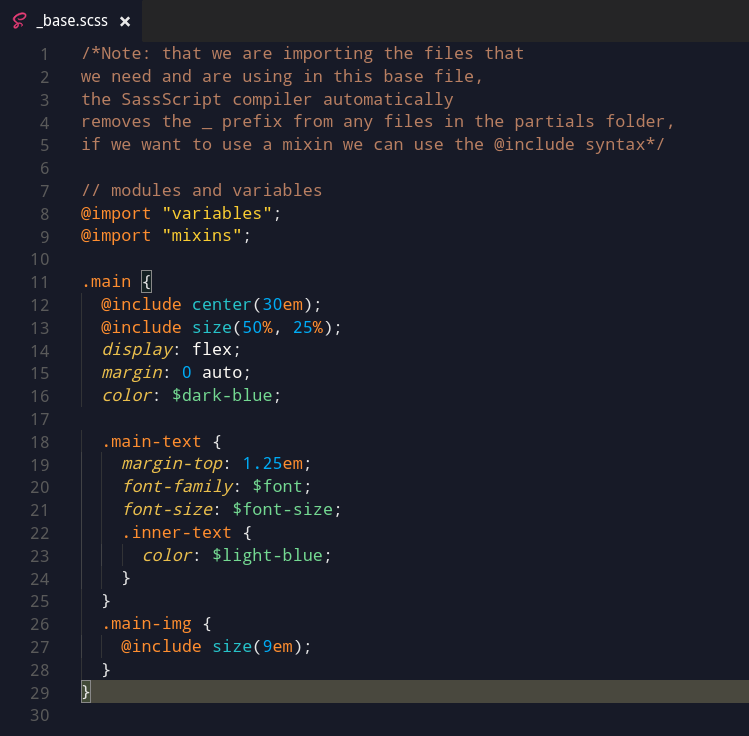
/*Note: that we are importing the files that
we need and are using in this base file,
the SassScript compiler automatically
removes the _ prefix from any files in the partials folder,
if we want to use a mixin we can use the @include syntax*/

// modules and variables
@import "variables";
@import "mixins";

.main {
  @include center(30em);
  @include size(50%, 25%);
  display: flex;
  margin: 0 auto;
  color: $dark-blue;

  .main-text {
    margin-top: 1.25em;
    font-family: $font;
    font-size: $font-size;
    .inner-text {
      color: $light-blue;
    }
  }
  .main-img {
    @include size(9em);
  }
}
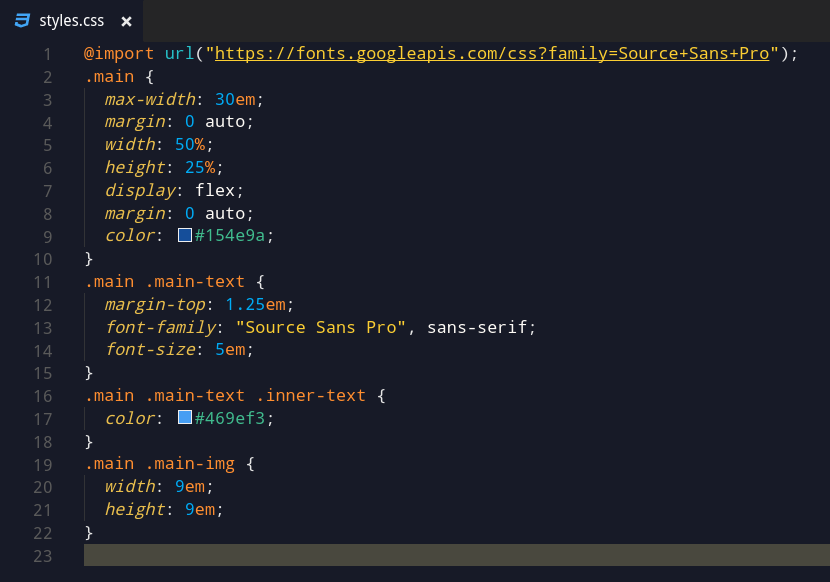
This is what this file will compile to:
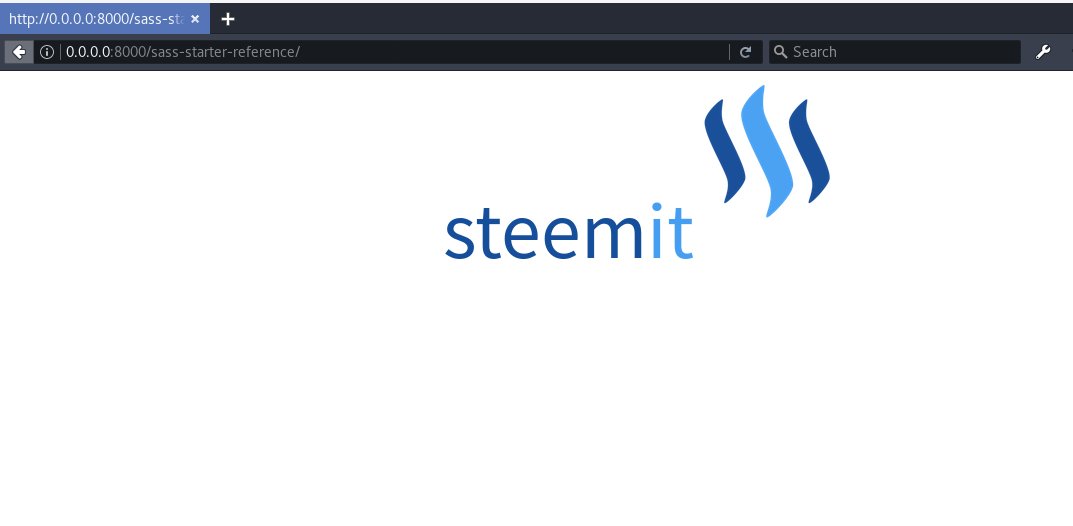
Open up the index.html and you should get the following output:
Other areas worth exploring and links to resources:
That was a brief intro to the basics of Sass thanks for reading!